

How To Draw Portraits For Beginners
- Home
- Portrait Cartoon
- Portrait Drawing Tutorial
Portrait Cartoon Tutorial: Function i
Blocking in the Portrait

The kickoff one-half of this portrait drawing tutorial is all about cartoon the 'block-in,' which can exist thought of as a map or blueprint. I t is a detailed line cartoon that addresses proportions, placement and structure of the head and features, shadow shapes, and even edge quality.
(Non certain what 'edge quality' is? Take my complimentary video course on the 6 stages of a realistic drawing to detect out!)
At the end of this page, make sure to click through to Page 2 of the Portrait Drawing Tutorial, where I demonstrate how to shade (or render) the cartoon.
Let's become started!
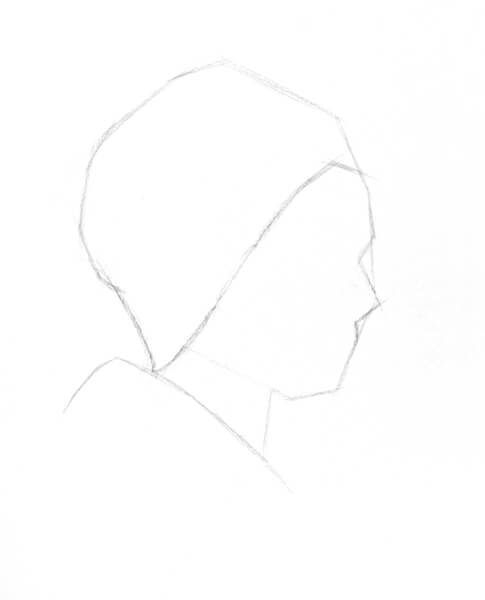
![]()

Pace one! Decide how large you want your drawing to be on your paper.
Jot downwardly a measurement that volition indicate the elevation of the drawing, as I have done here.
Every bit always, work from 'general to specific'.
This means that y'all first with the largest, virtually general measurements (such as the height and width), and so motility to incrementally smaller measurements until y'all get to the smallest, nigh specific ones.

I detect that the width is slightly narrower than the top, and indicate this on my drawing.
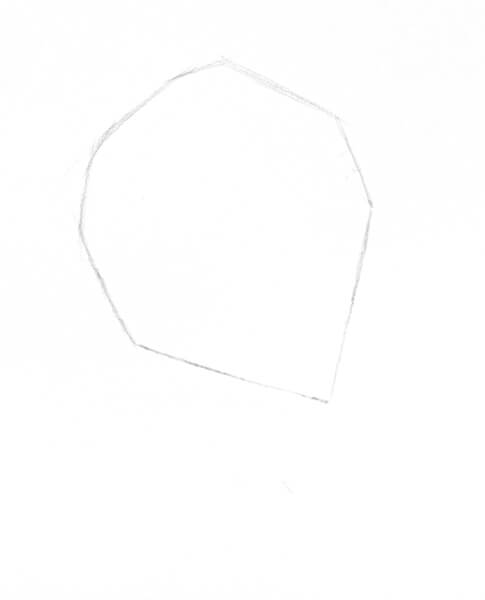
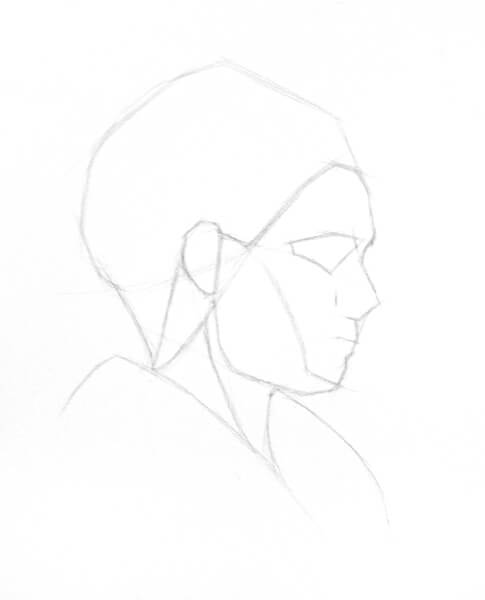
I begin to map out the general shape of the caput.
I describe with low-cal, straight lines so that they are easy to erase and edit.
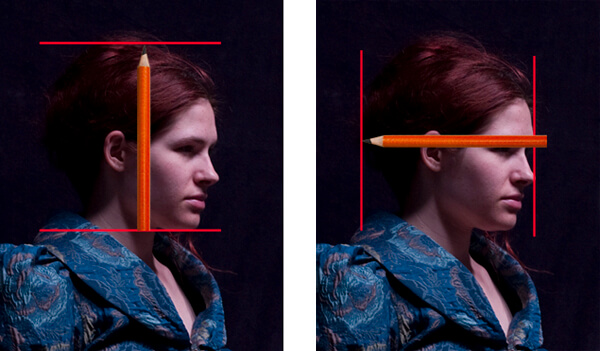
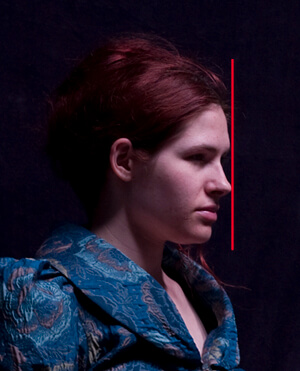
Visualizing the Angles of the Caput
There aren't many truly directly lines when cartoon something organic (similar a person!).
Everywhere you look, you become some degree of curvature.
Still, creating the angles of the head with direct lines as opposed to curved ones volition issue in a more than accurate cartoon afterward on.
To assistance yourself visualize straight lines, extend your pencil in front end of you to see the angles of the head more clearly.
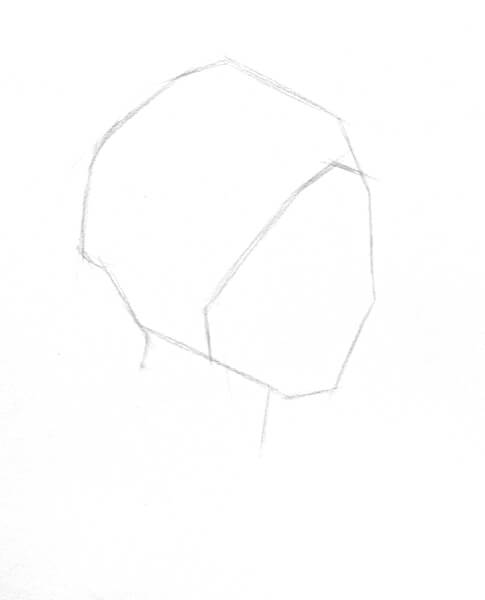
I begin to refine the contour of the head by breaking up the angles into smaller, more than specific segments.
Something I want to emphasize in this portrait drawing tutorial is to wait for lines that flow into one some other.
For instance: the hairline flows right into the line of the shadow being cast onto the neck.
When connected, these lines create a beautiful Southward-curve.
The more than elements you can relate to each other on the confront (such as these ii lines), the more than accurate and organic-looking your cake-in will exist.
![]()
F R East Eastward D O W N 50 O A D
At the end of this article, download a free infographic version of this page!
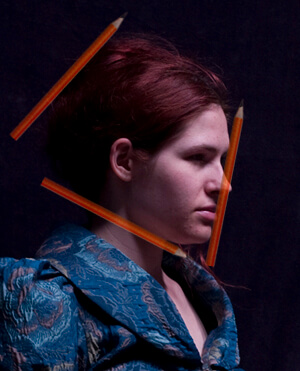
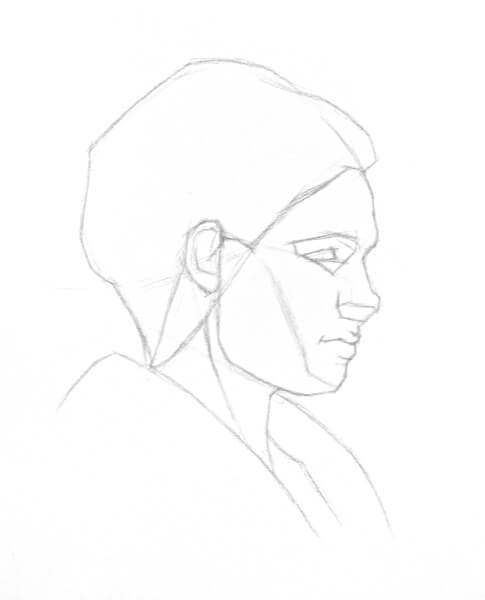
Drawing the contour of the profile

Equally you begin drawing the profile of the profile, imagine vertical centrality lines from which yous tin measure certain points on the face.
For example: I can imagine a vertical line originating at the front of the model'southward chin.
This helps me to see how far the lips, nose, and brow extend to the right of the line.
I can also imagine a straight vertical line at the tip of the olfactory organ.
This clearly shows me that the brow nearly reaches the line, merely not quite. The nose extends to the correct ever so slightly more than the forehead.
Now I know where to draw the forehead in relation to the nose!
You tin create these imaginary axis lines anywhere, and utilise them in any way that they are helpful to y'all.
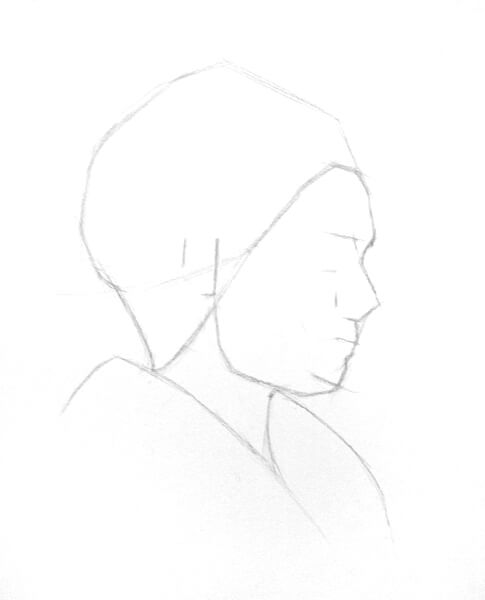
How did I identify the ear?
Since I have already institute the gauge location of the olfactory organ, I imagine a horizontal line through the tip of olfactory organ, and look to see how far to a higher place this line to identify the ear.
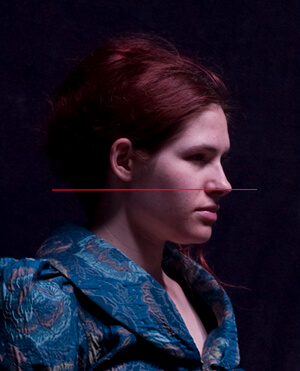
Refining the profile of the face

To refine the contour of the face, I again rely on the centrality lines I used earlier.
Remember the vertical line that I imagined at the tip of the olfactory organ? Wait at the shapes created between that line and the contour of the face up.
These are called negative shapes (or negative space). "Negative" refers to the space where there is no form. And then, naturally, the "positive" shape would be the shape of the actual subject (the face).
Negative shapes are extremely useful in refining the contour of the confront!
![]()
How to employ negative shapes:
As you depict, try to forget that y'all are drawing a confront. Forget that y'all are cartoon a forehead, a nose, lips and a chin. Instead, await at the negative spaces as abstruse shapes, and depict them as such! This slight change in perspective may not seem like much, only it often results in a more accurate cartoon.
I use straight lines to cake in the contour of the face up, just every bit I did when I was blocking in the large angles of the head. Straight lines help to clearly betoken the loftier points (the well-nigh protruding points, or boundaries) on the profile.
Once I am confident in the placement of the features, I begin constructing them anatomically. This stage of constructing the features is a combination of what we encounter and what we know. Considering we frequently can't come across the construction of the features clearly, it's essential to have an agreement of what is in that location in club to construct them accurately.
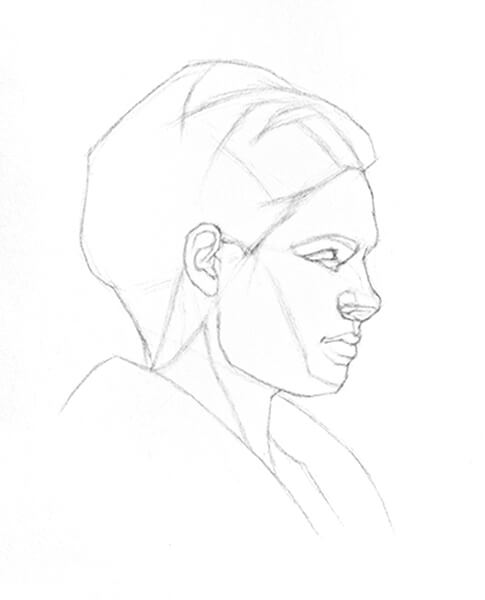
For case, light may wash out sure information on your model, or hide it in shadow; you might non be sitting close enough to the model to come across enough detail, o r possibly the model has very soft angles that hide elements of the construction of the face.
In all of these cases, information technology'south important to take an agreement of head and feature construction so that you can fill in these visual gaps.
View my tutorials of the features of the face listed on the portrait drawing page to start learning about their structure.

Voila! Here is my completed cake-in for this portrait drawing tutorial.
I have synthetic the features, drawn in the shadow shapes, and indicated some of the differences in border quality. I take too left some of the flowing rhythm lines, because they remind me that every element in my picture relates to something else, and that nothing exists in isolation. If I keep this in mind as I render the portrait, I am more than likely to create an organic-feeling, unified picture.
What next?
Download an infographic of this lesson below, and don't miss the side by side page of the portrait drawing tutorial, where I demonstrate how to shade it realistically.
Happy Drawing!
![]()
Proceed to Page 2 of the Portrait Drawing Tutorial
F R E E D O Due west N 50 O A D
Download a free infographic of this portrait drawing tutorial block-in
(plus, get a weekly newsletter and access the Members-Only Drawing Resource Library)!
![]()
Enjoyed this page? Please share it!
Share buttons and pinnable paradigm beneath:

If you enjoyed this portrait cartoon tutorial, you might also be interested in:
Related Pages
How to Shade a Portrait
5 Proportions of the Face to Know
How to Draw Realistic Optics
How to Draw Realistic Lips
Return to Portrait Drawing from Portrait Cartoon Tutorial
Return to Cartoon Tutorials from Portrait Drawing Tutorial
Return to the Homepage

Source: https://www.thedrawingsource.com/portrait-drawing-tutorial.html
Posted by: whitakertecame.blogspot.com
0 Response to "How To Draw Portraits For Beginners"
Post a Comment